
In Bug Bounty or in general hacking we tend to use Burp Collaborator for detecting for out-of-band data extraction. Burp Collaborator helps to detect bugs that cause external interactions. These bugs include, Blind SQLi, Blind CMDi, SSRF, etc. Lets see how to setup Private Burp Collaborator in our VPS.
Default Burp Collaborator in great but it’s more helpful to have your own Private Burp Collaborator . Some WAFs are configured to filter Burp Collaborator payloads due to which you mayn’t get desired results. So to bypass WAFs which detects our default burp collaborator payload we need to setup private Burp Collaborator of our own.
Requirements
- Docker
- Domain
- BurpSuite Professional
Setup domain
Go to your DNS Manager in which your domain is. Now setup a subdomain and add NS record to your burp collaborator subdomain, and A record pointing to your server as shown in image.

Environment Setup
If you don’t have docker then
sudo apt update && sudo apt upgrade -y
sudo apt install docker.io
After installing docker you can proceed further.
git clone https://github.com/integrity-sa/burpcollaborator-docker.git && cd burpcollaborator-docker
wget "https://portswigger.net/burp/releases/download?product=pro&version=2021.10.3&type=Jar"

mv 'download?product=pro&version=2021.10.3&type=Jar' burp.jar && mv burp.jar ./burp/pkg/burp.jar
Make sure to replace domain and IP with your respective domain and Server IP
./init.sh burp.hackplaza.net 20.119.42.229Incase if you get error like this:
Error starting userland proxy: listen tcp4 0.0.0.0:53: bind: address already in use.

Use these commands to solve:
sudo systemctl stop systemd-resolvedInbound Rule
If you again get some error like this

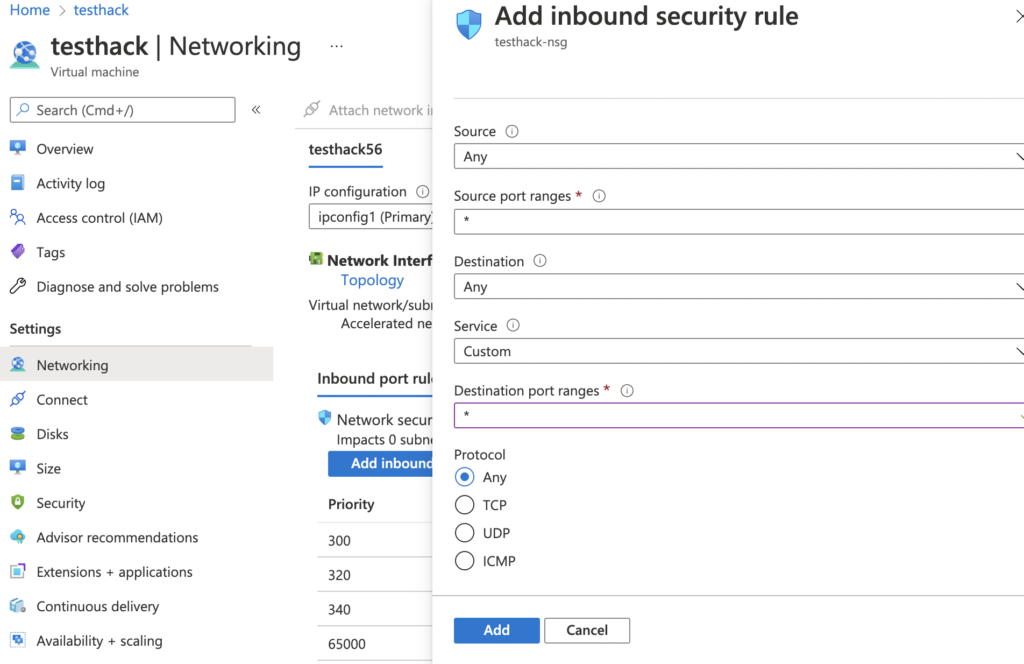
You have to make some changes in Networking group to allow Inbound connections. You have to do this in your VPS provider accordingly . I am using Azure so here is how to do:
- Click on VM > Networking > Add inbound port rule > In Destination Port ranges keep * in it and finally click on Add
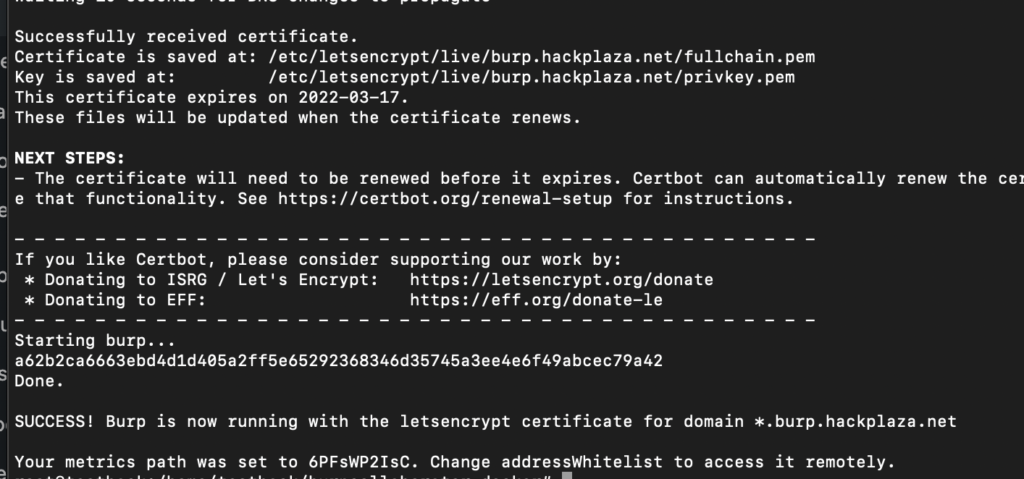
Again run ./init.sh burp.hackplaza.net 20.119.42.229 with replacing subdomain and Server IP with your own.
Successfull installation output will be like this:
Testing with BurpSuite Pro
Now to test if it is working or not. Follow these steps:
- Open your Burp Suite Professional
- Click on Project Options Tab > Misc > Burp Collaborator Server
- Select use private collaborator and do like shown in picture and click on Run Health check

Now you can use your private Burp Collaborator server normally from BurpSuite Pro and that’s the end of this tutorial on How to Setup How to Setup Private Burp Collaborator for Hacking